Make Your Own Rubber Stamp
Hi Everyone!
Shari here again, bringing you another crafty idea.
If you’re anything like me and you use a bullet journal or diary then you maybe like to decorate it with stamping. I got to thinking why do I always use shop bought rubber stamps for my Journal? I really would love a unique stamp that is just my own. One of a kind!
Well, as you all know I’m very creative and will have a go at anything artistic.
So I found myself a bunch of erasers and set about carving my own rubber stamp.
I have a carving tool with my linocut equipment and using that and a Benchhook which is the wooden tool that goes over the edge of a bench and helps keep the Lino in place whilst you carve. The carving tool is called a gouge and there are various sizes and shapes to choose from.
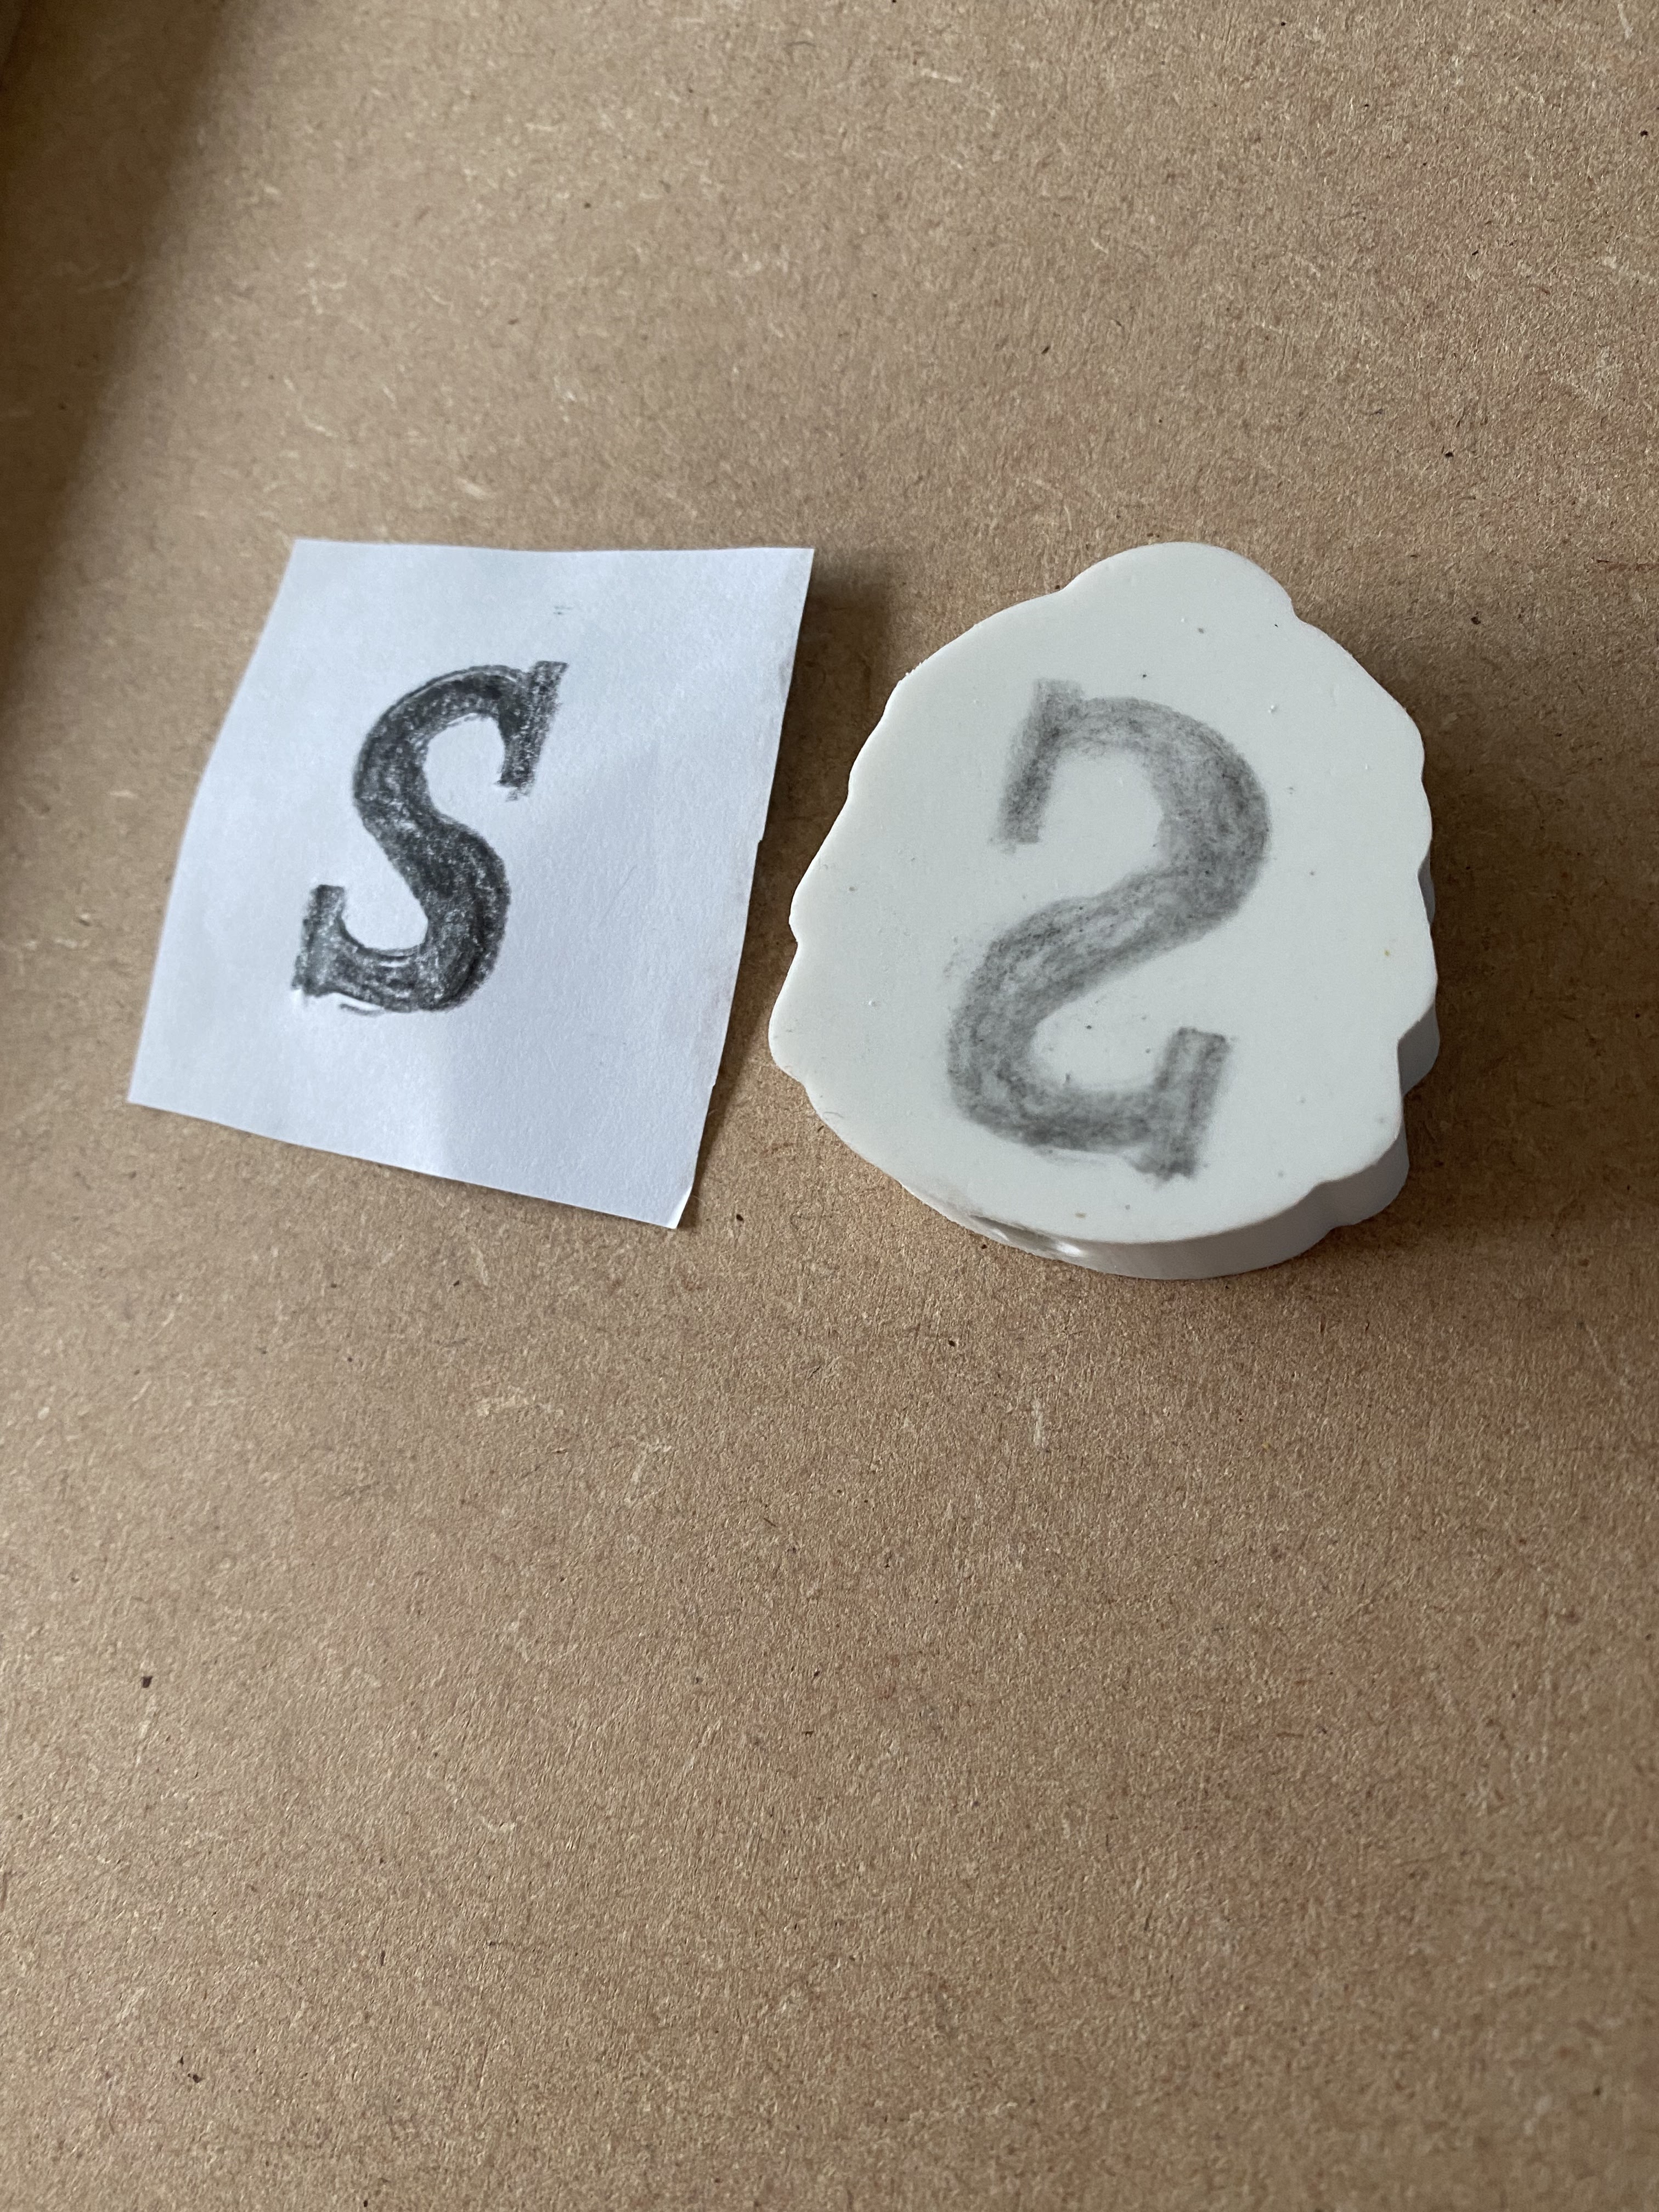
First of all I needed a design and for my maiden stamp I settled for something simple like my initial - S.
Next I checked out lots of font styles to find one I liked the look of (and could hopefully be successful in carving!). I settled for one with quite a wide style as I wanted the letter to be the area to accept the ink and therefore would need to cut away the surrounding area.
I drew out my design on a piece of paper and then transferred it over to the rubber, remembering of course to reverse the letter on the rubber so that the stamp would come out correctly when inked. I also decided that it would be more aesthetically pleasing to leave a raised rim around the outside of the letter.
Using the gouge with care and taking my time, I carved out the negative space around the letter, ensuring that I didn’t cut away the outer rim that I intended to frame the letter.
It was easy to cut into the rubber and I really enjoyed the process. Compared with linocut, this technique with rubber is way easier - like cutting into ice cream! Loved it.
I couldn’t wait to try it out and inked the stamp in blue. You will notice that some of the areas of the letter are a little ragged and this is because I accidentally cut away some bits that weren’t intended to go 😂.
However, overall I’m very pleased with the result and can’t wait to try another.
What do you think? Is it something you’d like to try? If so, go ahead it’s so easy. I can’t believe I’ve never tried this before. Would love to hear of any that you’ve tried, just post in the comments below. Also, any ideas for my next stamp design would be very welcome, I’m always happy to hear your ideas.
I will be back next Thursday, so until then…

Happy crafting! See you again next week.


Comments
Post a Comment